
Tutorial 03 · Intermediate level
How to add extensions to a scalp braid step by step
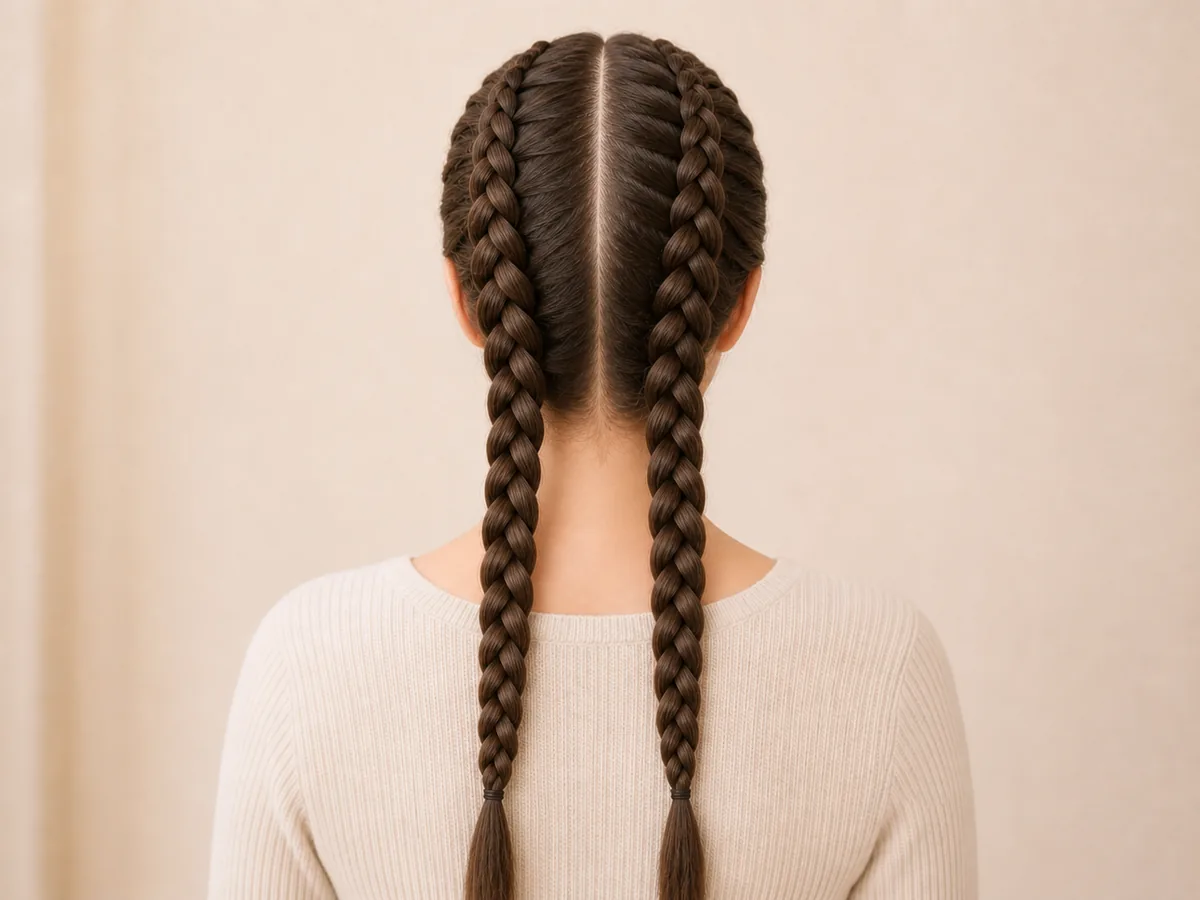
The technique feed-in involves adding small portions of braiding hair as the scalp braid progresses. Starting with a little creates a finer base and lets the braid thicken without forming a knot at the root.
- Level
- Intermediate
- Practice
- On another person
- Technique
- U-shaped feed-in method
- Result
- Two braids with extensions
Recommended learning path
Need to review the basics?
This tutorial assumes the hair is already prepared and you are comfortable making a scalp braid. If you came here directly, review these two steps first.
Before you begin
Prepare a suitable starting point and all the materials
Work on clean, conditioned, detangled and completely dry hair. Follow Tutorial 01 on preparing and sectioning the hair, keeping one half secured while you work on the other. Do not continue if the scalp has wounds, scabs, pain or irritation.
- 01Braiding hairLight, loose, tangle-free extensions
- 02Comb and clipsTo keep each section neat
- 03Metal-free hair tiesSimple finish without heat
- 04Optional productA small amount, following the manufacturer's instructions
Important:“Kanekalon” is a specific type of fibre, not a name for all extensions. In this guide we use the general term braiding hair and we do not use hot water or any other sealing method.
Step 1
Separate the extensions before you start
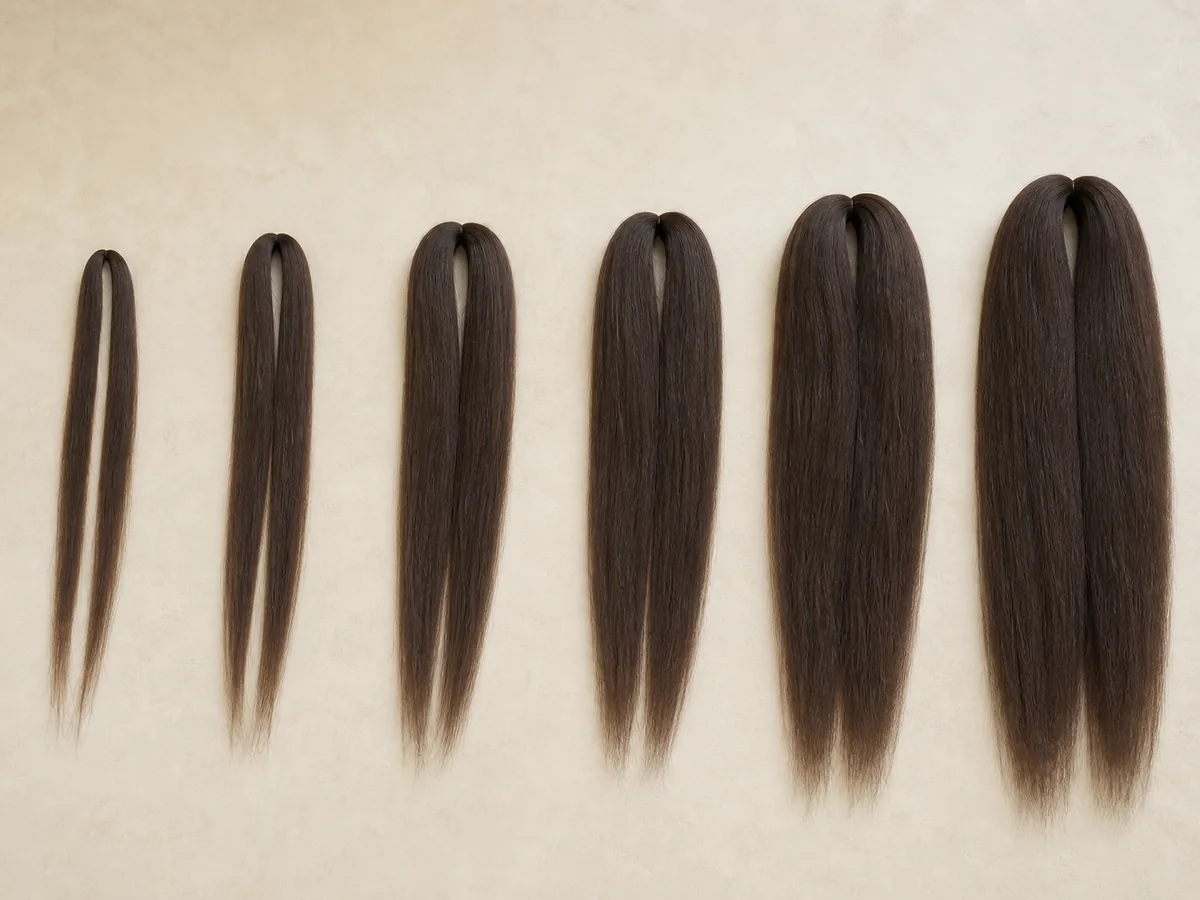
Prepare two matching sets of extensions, one for each braid. In each set, arrange the portions from very small to slightly larger, keeping the midpoint of each one visible. This avoids having to let go of the three strands to separate more fibre as you work.
Start with less and increase gradually
The first portion should be the thinnest. The following ones increase gradually so the braid gains volume without a sudden jump.
There is no universal number: it depends on natural hair density, section width, length and final thickness. The six portions in the photograph are only a visual example.
- Two matching sets
- An easy-to-find centre
- From smaller to larger
Step 2
Start with the natural hair first
In the half you are working on, take a small section at the hairline and divide it into three strands: left (I), centre (C) and right (D). Make two to four underhand crossings, adding natural hair just as in the basic scalp braid.
- 1Three strandsI (left), C (centre) and D (right) clearly separated
- 2Natural startTwo to four underhand crossings
- 3A secure pauseThe braid looks thin and flat
Two different additions: natural hair is picked up as part of the braid's regular rhythm; portions of extensions are added only at selected points. These are two different movements.
Step 3
Add the first portion using the U method
There are several professional grip methods. To make practice repeatable, this guide uses one version: fold the portion in half and add its two ends to the outer strands.
- Pause before the next crossingKeep I (left), C (centre) and D (right) separate and close to the scalp.
- Place the centre of the U underneathDo not tie a knot: one end goes towards I (left) and the other towards D (right).
- Make three groupsJoin X1 to I (left) and X2 to D (right). C (centre) has no added extension at this point.
- Complete two underhand crossingsCross one outer strand and then the other; keep hold of the fold until both crossings are complete.
The braid's weave holds it in place, not stronger tension at the roots.

Step 4
Continue adding extensions gradually
Return to the normal braiding rhythm. Once the first join is stable, add the next, slightly larger portion using the same sequence. When practising, leave one or two complete cycles between additions and avoid adding several portions at the same point.
Control the thickness and the three strands
Keep picking up natural hair from each side of the half you are working on. At the chosen points, add one portion of extensions and check that the three groups remain similar in thickness.
Once you reach the volume you want, stop adding extensions. You do not need to use all the portions you prepared.
- Fine starting point
- No visible loops
- Three balanced strands

Step 5
Finish at the nape and repeat on the other half
Once there is no more natural hair to pick up, gently balance the three strands and continue as a free-hanging braid. Secure it with a hair tie suitable for the extensions. Repeat the same progression in the other half using the second set of portions.
Compare both sides before finishing the hairstyle
- Both braids start fine, without a knot.
- The thickness increases similarly on both sides.
- No horizontal loop of extensions is visible.
- The centre part stays clean and the scalp remains flat.
- The person feels no pain, stinging or headache.
Checking and correcting
Common mistakes when adding extensions
A bump forms
The portion is too large or was added too early. Undo the join and use a smaller one.
The extension is visible
Centre the fold more carefully and separate its two ends. Do not hide the loop by pulling on the roots.
The added portion slips
Keep hold of the midpoint until both crossings are complete, then return to the normal rhythm.
The braid twists
Even out the three groups and check that both hands apply similar tension.
Ends stick out
Smooth the hair and redistribute the strands. Do not cut without distinguishing extensions from natural hair.
It hurts or stings
Stop styling, undo the section and reduce tension and weight. If symptoms persist or there is hair loss, consult a dermatologist.